If you’re running Windows 8 or recently upgraded, you might have run into some frustrating WiFi issues. Windows 8 is inherently a different beast than previous versions of Windows and with it comes a new set of problems. I never encountered too many wireless problems in Windows 7, but have run into several with Windows 8.
In this article, we’ll go through a couple of the most common problems with WiFi connections in Windows 8 and how to troubleshoot them. Most of the problems occur with those computers that got upgraded from Windows XP or Windows 7 to Windows 8. Either the driver is out of date or the adapter gets disabled or something odd like that. Let’s get started.
Limited Connectivity Message
If you’re getting that annoying limited connectivity message in your task bar in Windows 8, it’s really hard to tell what the problem is. You basically just have to try a couple of things and hope one works. The cause could be anything from the network adapter to the wireless router to a bad network cable. I’m only going to mention a few of the major reasons here, but scroll down to the Other Troubleshooting Tips section if none of these fix your problem.
Method 1 – Troubleshooter
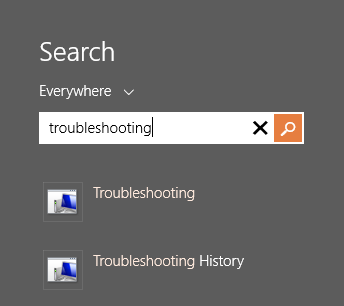
The first thing you can try is to run a couple of the network troubleshooters built into Windows 8. A lot of the time, it can solve your wireless or Internet problem for you. To open the troubleshooter, open the search charm and type in troubleshooting. Then click on Troubleshooting, the first option.
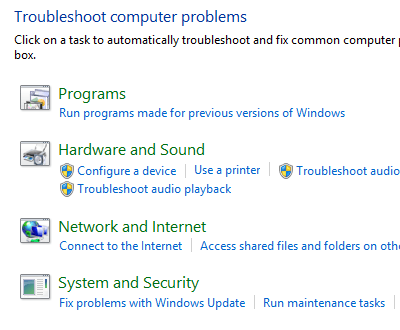
Now you want to click on Network and Internet.
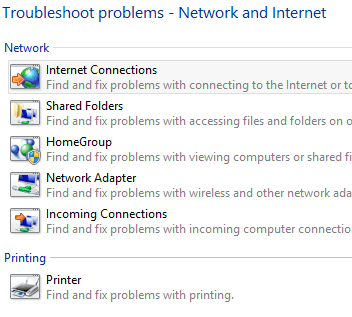
Finally, you will see the different troubleshooters available for fixing wireless and Internet problems. The ones you will want to run are Internet Connections and Network Adapter.
Method 2 – Reset TCP/IP in Windows 8
You might also get a message like this when running the troubleshooter:
WiFi does not have a valid ip configuration
In this case, you can reset the TCP/IP stack and Winsock and see if that works. To do this, again open the search charm and type in command prompt. On the first listing, right-click and choose Run as Administrator.
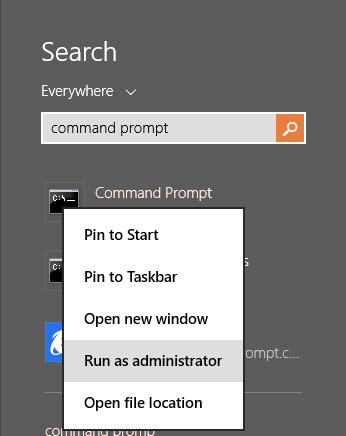
At the command prompt, type in the following two commands, one at a time and make sure to press Enter after each one:
netsh winsock reset catalog
netsh int ip reset c:\resetlog.txt

Hopefully, your wireless connection is working at this point. If not, skip down to the bottom section which has more troubleshooting tips.
WiFi is Disabled or Greyed Out
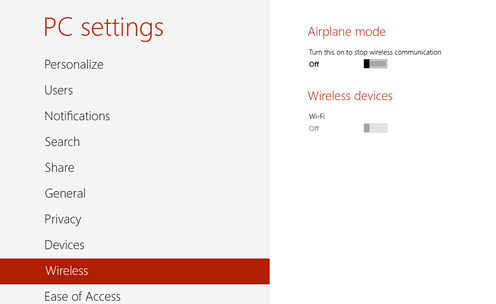
in one odd case, I had a Surface tablet where the wireless was disabled and I could not even enable it. For some odd reason, the On/Off toggle switch for Wireless Devices was greyed out like below:
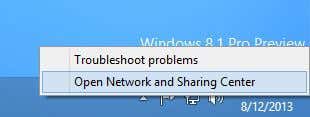
The first thing you can do is try to diagnose the connection. To do this, open Network and Sharing Center. You can simply right-click on the network icon in the task bar and choose it or you can open the search charm and type it in there.
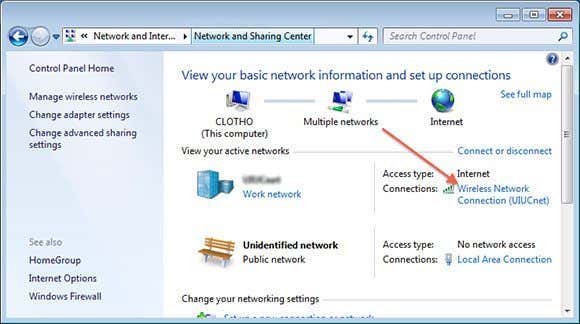
Now find the wireless connection at the top and click on the blue link:
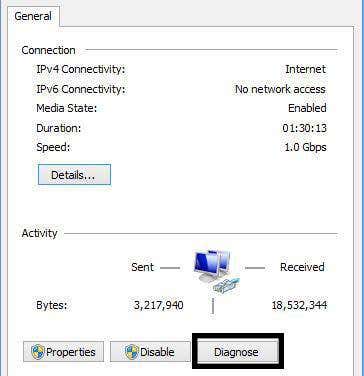
A new dialog will pop up and here you’ll see there is a Diagnose button. Go ahead and click on that and let Windows try to fix it for you.
The next thing you can try is to restart in Safe Mode, Network Enabled and try to turn on the Wireless there. For some reason on certain computers, the option is not greyed out in safe mode, so you might be able to enable it there and then restart in normally. Read my previous post on how to boot Windows 8 into safe mode.
The other thing you can try is to disable and then re-enable the wireless network adapter. Again, open Network and Sharing Center and then click on the Change adapter settings link at the left. You can see it in the second screenshot above this paragraph.
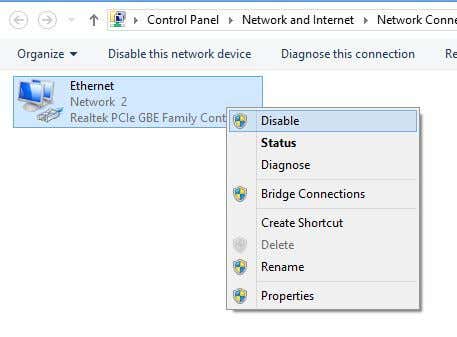
Right-click on the wireless network adapter (not the Ethernet one like shown above) and then click onDisable. Once it’s disabled, go ahead and right-click again and then choose Enable. Now try to go to Wireless in PC Settings again and see if you can enable WiFi.
If this doesn’t work, again drop down to the last section which has more WiFi troubleshooting tips.
WiFi Not Connecting from Sleep or Hibernation
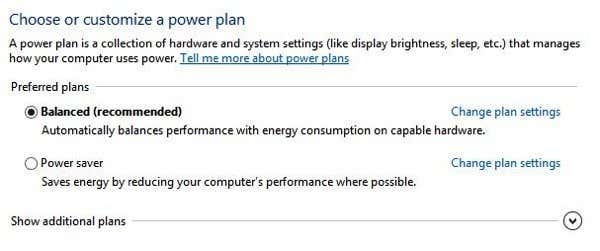
If your Windows 8 machine is disconnecting from the wireless network whenever you return from sleep or hibernation or any other standby state, then your problem is probably with a power-saving option set on the network card. To fix this, you need to open the search charm and type in Power Options.
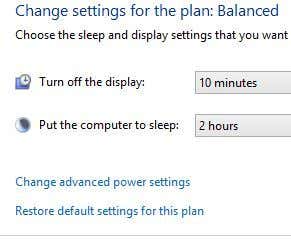
Here, click on the selected plan and then click on Change plan settings.
Then click on the Change advanced power settings link.
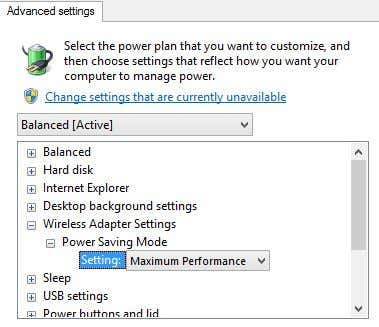
Now scroll down to Wireless Adapter Settings and make sure the Power Saving Mode is set toMaximum Performance.
Other Troubleshooting Tips
Check Network Card at Compatibility Center
You can check to see if your wireless network card is compatible with Windows 8 by visiting the Capability Center. Go ahead and type in the name of your wireless card and you should get a little report like this:
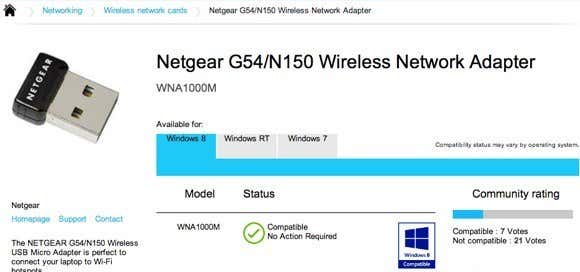
It’ll have a little blue logo if it is compatible or not. You can also check Windows RT in addition to just Windows 8. So this is a nice site to check out if you are having issues with your WiFi network, especially if it’s not showing up at all in Windows 8 or it’s got a yellow exclamation sign in Device Manager.
Check Network Adapter Settings
Open Network and Sharing Center, click on Change adapter settings and then right-click on then wireless network adapter and choose Properties.
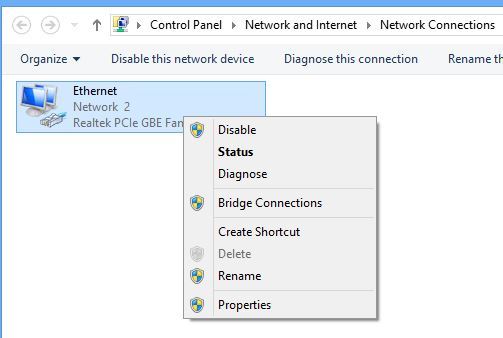
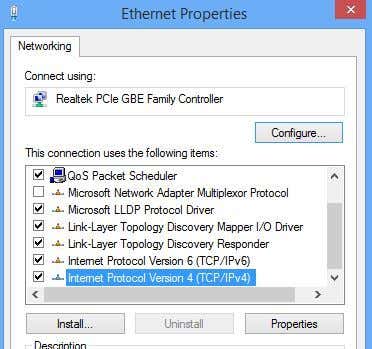
Now scroll down in the list box until you see Internet Protocol Version 4 (TCP/IPv4) and then click on the Properties button.
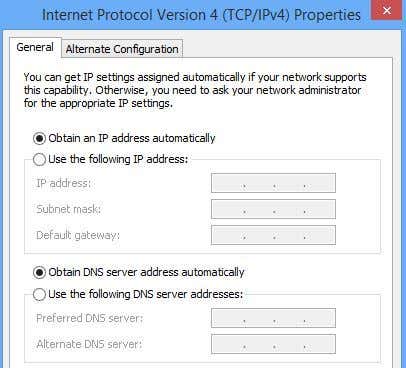
Finally, make sure the Obtain an IP address automatically and Obtain DNS server address automatically radio buttons are selected.
Check Wireless Switch
On most laptops, there is a wireless switch or button that can be toggled from on to off. Make sure you have that button set to On or press FN + F8 to enable the wireless card. The switch can be anywhere (sides, front, back, etc), but there is usually an indicator light so you can tell when it’s on.
Uninstall in Device Manager
Another quick tip is to go to Device Manager, right-click on your wireless network card and choose Uninstall. Then reboot your computer and it was automatically be detected and reinstalled. If it’s still not working after trying this, then read the next tip, which is updating the driver.
Update BIOS & Drivers
As always, it’s a good idea to download and install the latest drivers for your network card. This is especially important if you’re running Windows 8. As for the BIOS, I’ve always been the one to suggest not updating the BIOS unless it’s really needed. However, if you upgraded a computer from Windows XP or Windows 7 to Windows 8 and you tried everything above and updated the driver, then updating the BIOS might be worth it. 99% of the time updating the BIOS is just fine, but there are occasions when it fails and then leaves you with a computer you can’t boot. Only try this as a last resort and make a backup of your computer first just in case.
Reset the Router
If you’re getting the Limited Connectivity message, then you can try resetting the router. You can either restart it by just unplugging it, waiting about a minute and then plugging it back in. If that doesn’t work and you’ve tried all the stuff above, go ahead and reset your router. This will reset it to the default settings and will wipe out any security or configuration you had done earlier, so be careful and be ready to do that all again. It’s a last resort measure, but it could fix your problem.
Read my previous post on how to reset your router.
Remove Anti-Virus or Internet Security Suites
If you have something like AVG Internet Security or Avast or similar software installed on your PC or tablet, then go ahead and uninstall that program and see if your Internet connection starts to work. Many times Internet Security software has been the culprit and you could be pulling your hair out trying to figure out what’s causing the issue, so it’s worth trying.
So that’s a lot of stuff to try and practically every sane thing you can try. If none of this worked, then you could possibly have a hardware problem with your wireless card. If you have questions, feel free to post a comment. Enjoy!

