
Making an outline is one of those skills everyone learns in school. Even though the outline to the right is in Italian the layout probably looks familiar: Topic, Item, Item Descriptions then a new Item or new Topic and on and one it goes. But how do you make an outline like this in Microsoft Word? Here is some advice to help you make the outline of your dreams.
In this example we'll be using the 2003 version of Microsoft Word. Other versions may behave differently. For example, you will find this process is much easier in Word 2010 using the Outline View.
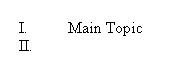
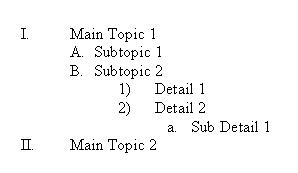
1) Open up Word and start by typing your main topic with a capitol "I." in front of it. In this example we'll be using roman numerals for the main topic, capital letters for the subtopic, numbers for the details, and lower case letters for the sub-details.
2) When you press the Enter button at the end of your main topic Word will recognize that you are making an outline and automatically give you a roman number "II." at the start of the next line, like this:
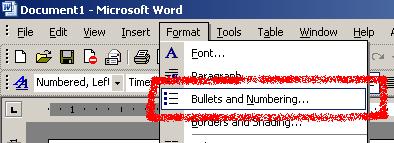
To turn the lower case "a." into an upper case "A." go to "Format" on the menu bar and look for "Bullets and Numbering"
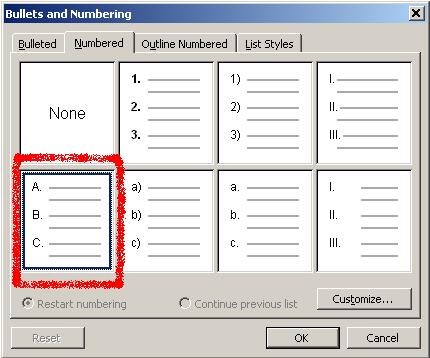
Look in the window that appears for the capitol letters you want for your subtopic and click on them. By using the tab key and this "Bullets and Numbering" window you should be able to get every line of your outline to look exactly the way you want it to.
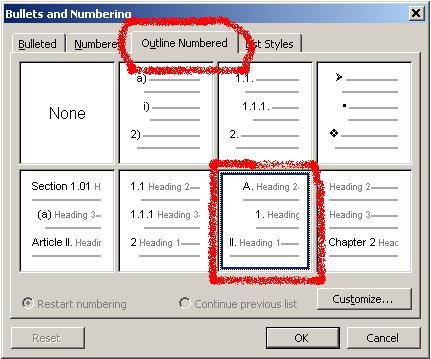
You might want to consider checking out the other outline numbering formats that are available in Word. To do that click on the "Outline Numbering" tab and look for the format you want:
 |
PRACTICE ACTIVITY: Try making an outline in Word that looks like this one:
 TO KEEP ON LEARNING: To learn more about making outlines in Word try searching the internet for:
Making an outline in Word
Outline format Outline Numbering |
Outline in MS Word
2:46:00 PM
0
Tags
