I’ve been blogging on Online Tech Tips and Help Desk geek for years now, but I really can’t use them to post random thoughts, ideas, links, notes, etc since they consist of more professional content. That’s why I decided two days ago to setup another blog using theaseemkishore.com domain name I had bought a long time ago. I ended up setting it up on Tumblr, which I love since it’s so easy to use and looks great.
The whole process took me about 10 minutes to do. I’m adding 20 more minutes for telling you how to do it because you might have to spend 10 minutes buying a domain name and 10 minutes getting a little used to GoDaddy’s interface. If you have a domain name, then you can probably setup a website using Tumblr in 10 minutes too. I’m going to use GoDaddy for the domain name and Tumblr for the website content management system. Of course, you can setup websites in a myriad of ways, but the point here is to go from no domain name to a fully functional website in 20 minutes.
1. Buy Your Domain Name

You can buy a domain name wherever you like, but I have all of mine at GoDaddy.com, so I’ll show you the steps specific to that site. You can probably get a domain name for cheaper somewhere else and the process of buying a domain name is not really that different, so get it wherever you like. If you already have a domain name you want to setup the website for, then skip down to the next section. Go to GoDaddy.comand type in the desired domain name. If it’s available, you’ll get the Congratulations message on the next page:

Go ahead and click on the Buy It Now button. On the next page, you’ll be able to choose the term for the domain name, which is set to 2 years by default. The current price for a domain name on GoDaddy is $12.49 a year. Go ahead and click on the Checkout button at the right:
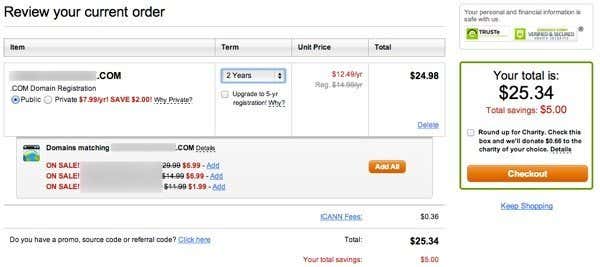
Type in your billing info and choose your payment method. Then just click on Place Your Order. You’ll have to create a GoDaddy account to manage your domain and change settings, but first let’s setup the front-end now.
2. Setup Tumblr Blog
Now go to Tumblr.com and click on the Sign Up button at the top. Go ahead and type in your email, a password and a user name.

You’ll get an email with a verification link. Click on that and you’ll be logged into your Tumblr account. Now you’ll have a default untitled blog. The URL will be username.tumblr.com. Now in order to get everything connected to your custom domain name, you need to click on the Settings (gear icon) at the top and then click on Untitled below Apps. In the screenshot below, it’s my name because I renamed the blog from Untitled to Aseem Kishore.
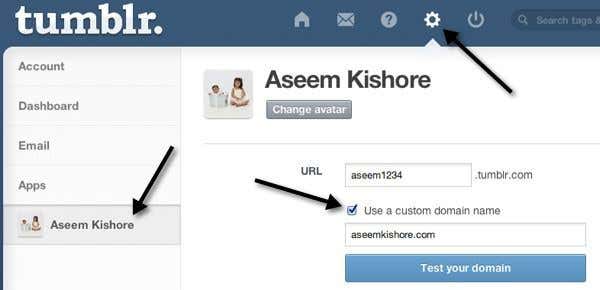
Check the “Use a custom domain name” box and then type in the domain name you just bought. Don’t click Test your domain yet, because we haven’t configured the domain name settings yet. That’s all you have to do on Tumblr, the rest is done over at GoDaddy.
3. Configure DNS Settings
In order to get a custom domain name to work with Tumblr, all you have to do is change one setting for you domain. That’s why it’s so easy and fast. Tumblr has a FAQ page on how to do this, but I’ll walk you through it since it’s the only semi-complicated part of this whole process.
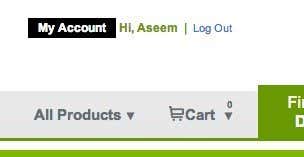
First, go to GoDaddy.com and click on MyAccount at the top left after you login.
Next, click on Domains to manage your domain or domains.
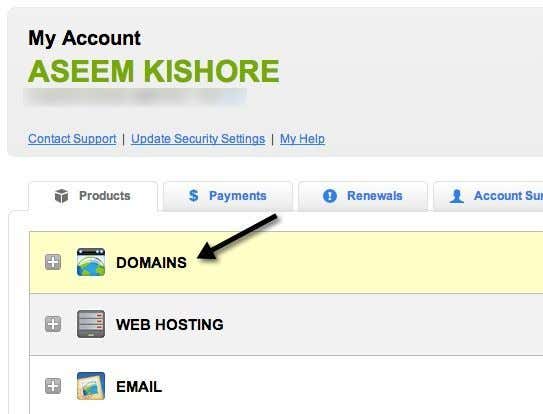
A list of domain will pop up below and you’ll see a button called Launch at the right.
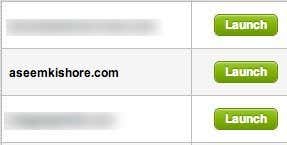
Now you’ll be at the Domain Details page, which looks quite overwhelming if you don’t have any idea what that stuff means. Don’t worry, you don’t need to know anything about it. What you have to do is launch theDNS Manager, which is towards the bottom.
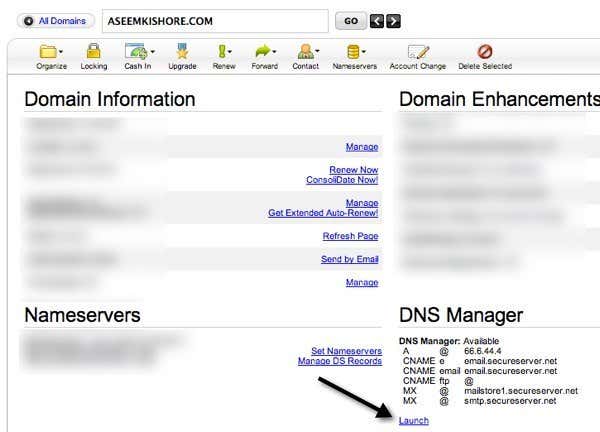
Now here’s where the magic happens. There are two ways to go about getting this setup to work. One way is that you edit a record called the A record. Another way is to add a CNAME record. Don’t worry about what it means, it’s not worth the trouble. Why are there two ways? Well, if you edit the A record, then your website URL will be domainname.com. If you want the www in front (www.domainname.com), then you have to use the CNAME record. It’s just a matter of preference.
If you go the route of changing the A record, typing www.domainname.com will simply redirect to the non-www version. I did mine using the A record method. To do that, click on the little pencil icon in the Points tobox under the heading A (Host).

Change whatever IP address is there to 66.6.44.4. That is the IP address for Tumblr. That is all you have to do. Now you just wait a few hours and you’ll be able to visit your domain name and it should load up your Tumblr blog! If you really want that www in front, then modify the CNAME record. If you scroll down, you’ll see one called www.
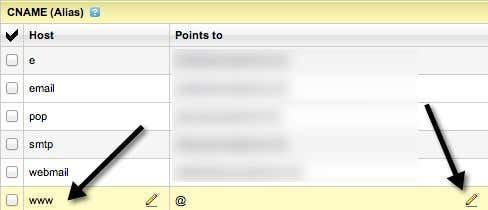
Click on the pencil icon in the Points to box for www and change the value to domains.tumblr.com. That’s it. Note that you only have to do one or the other, not both. I’m not really sure what happens if you do both the A record and CNAME record, but I’m not going to try it and it’s not recommended.
So there you have it: a super fast way to go from no website to great-looking website in no time. Tumblr is not for everyone, but it’s got that ultra-convienent feature of just having to change one record in your DNS settings to get it to work with a custom domain name. If you have any trouble or have a better way than what I’ve done, post a comment and let us know. Enjoy!

